Why Your Free JPG-to-PES File Isn't Stitching Right is coming soon…
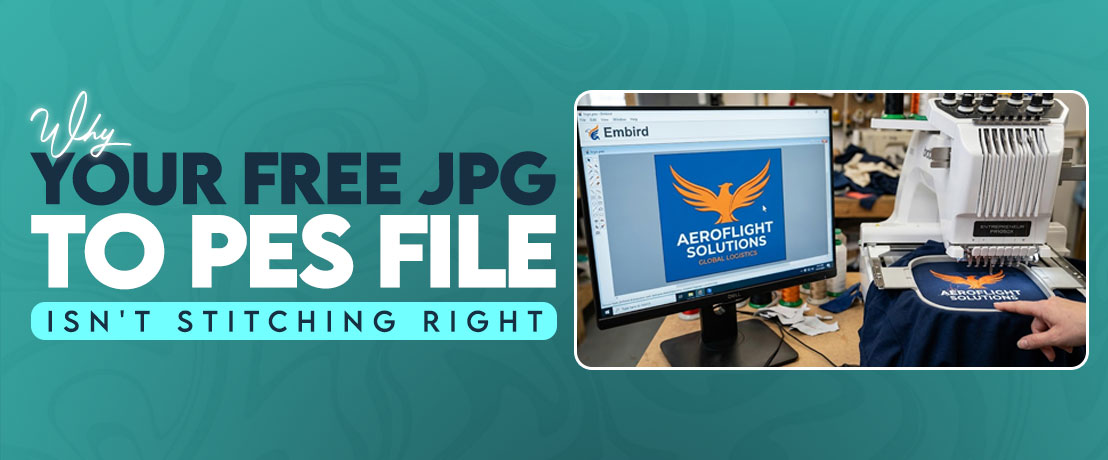
A JPG can look sharp, clean, and ready to stitch in your software, but that doesn’t mean the design has the information an embroidery machine needs. When someone uses a convert jpg to pes tool or works with Embird embroidery software, the biggest problem usually starts when the picture gets treated like embroidery data. A JPG stores pixels. A PES file needs stitch locations, stitch types, thread changes, sequencing, and other instructions that tell the machine how to build the design.
I have seen this issue with logos that looked almost perfect on screen but became a completely different story on fabric. A small letter may close up, an outline may shift, or a large filled area may pull the fabric out of shape. The file extension may say PES, but the real question is whether someone actually built the stitches correctly.
What Actually Happens When You Convert a JPG to a PES File?
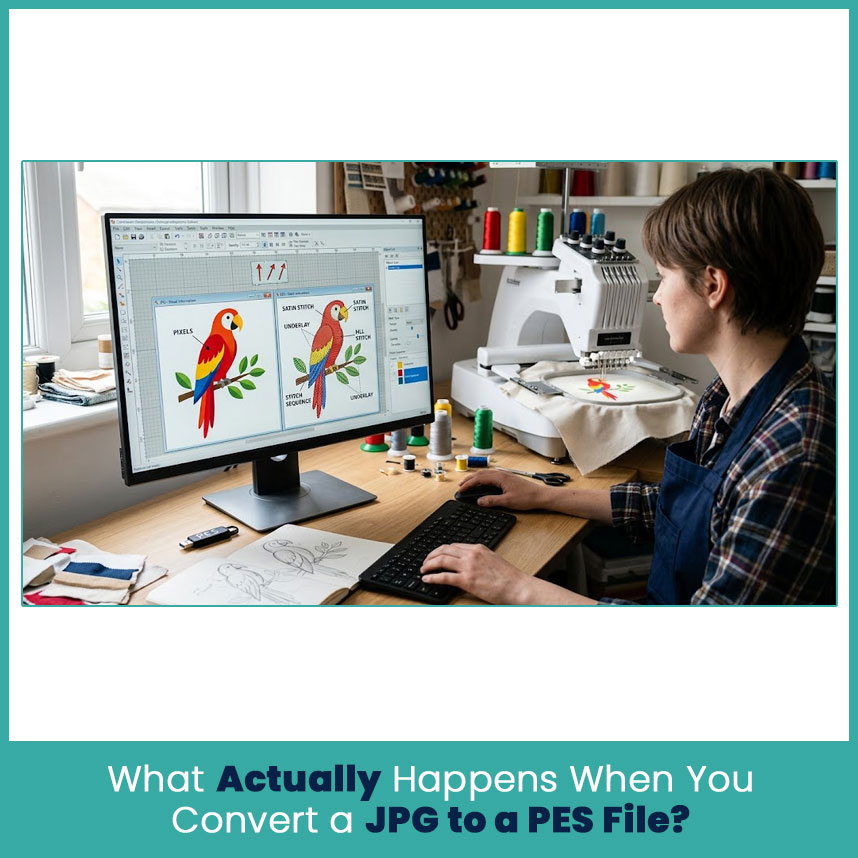
The word “convert” can make the process sound easier than it really is. Changing the file format does not automatically turn artwork into a well-planned embroidery design.
JPG Is a Picture, PES Is a Set of Stitch Instructions
A JPG records visual information as pixels. It can show color, shading, outlines, and details, but it does not know how a needle should travel through fabric.
A PES file works differently. It contains embroidery information that a compatible machine can interpret. Depending on the design, that information needs to account for:
- Stitch points and directions
- Satin, fill, or running stitches
- Stitch density
- Underlay
- Thread color changes
- Stitch sequencing
- Needle movement
- Compensation for fabric movement
That difference matters more than many people realize. A red circle in a JPG is simply a group of colored pixels. In an embroidery file, that same circle needs a stitch structure that keeps its shape after thousands of needle penetrations.
Why Automatic Converters Skip the Digitizing Step
An automatic tool can recognize basic shapes and colors, but recognition is not the same as embroidery planning.
For example, a converter may see a black border and turn it into a line of stitches. It does not necessarily understand whether that border needs a satin column, a running stitch, a different stitch direction, or extra compensation.
That is where the real work begins.
Common Stitching Problems With Free JPG-to-PES Converters
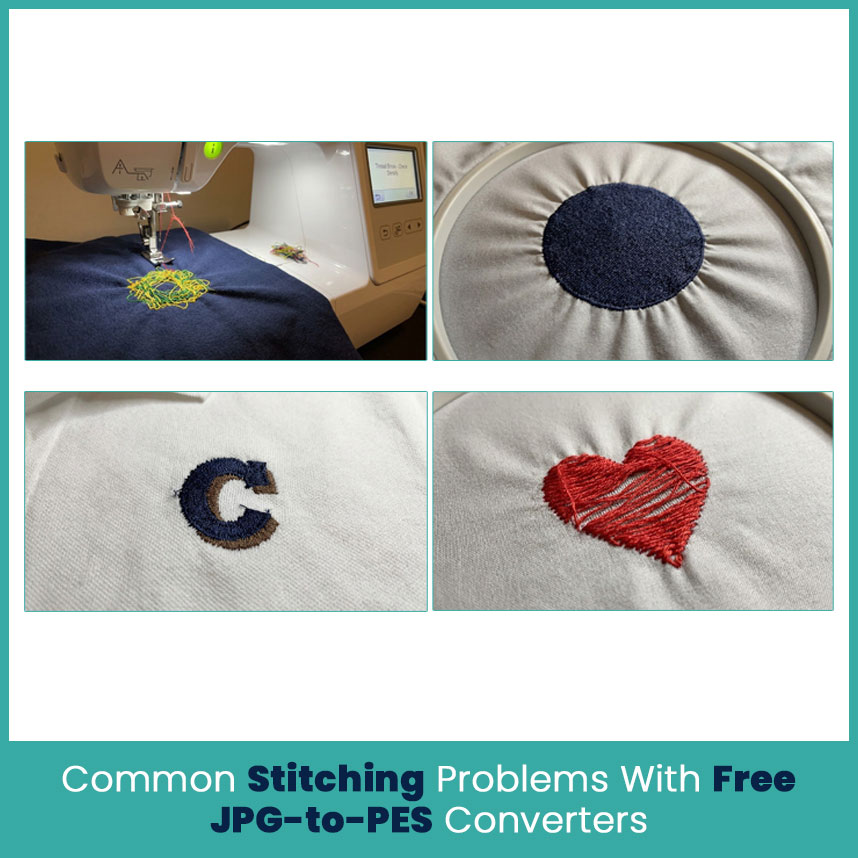
A converted file can look acceptable in embroidery software and still cause problems once the needle starts working through fabric. The screen shows the artwork, but fabric reacts to tension, density, direction, and movement.
Thread Breaks and Constant Machine Stops
Thread breaks can happen for several reasons, and a poorly planned file can make the problem worse.
When stitches sit too close together, the needle repeatedly enters nearly the same area. Dense sections can create unnecessary resistance, especially when the design contains heavy fills or repeated passes.
I usually check stitch spacing before blaming the thread. If one small section contains far more stitches than the surrounding artwork needs, the file itself may be the first thing to correct.
Other warning signs include:
- Very short stitches packed together
- Excessive overlap
- Sudden changes in stitch direction
- Poorly planned travel stitches
- Too much detail in a small area
Puckered or Distorted Fabric
Puckering does not always mean the fabric is poor. Sometimes the file asks too much from the material.
A large number of stitches can pull the fabric inward. If the design has no sensible compensation or support underneath, the finished shape may become smaller or uneven.
This problem becomes easy to spot around circles, small lettering, and long narrow shapes. The design may have looked balanced in the artwork, but the stitched version can lose that balance.
Misaligned Colors and Jagged Edges
Automatic conversion can also create messy edges.
When a JPG contains anti-aliased edges, shadows, or soft color transitions, the converter has to decide where one color ends and another begins. That decision can create unnecessary color areas or rough stitch boundaries.
Small logos suffer the most because there is little room for error.
A clean embroidery design usually needs clear shape boundaries before stitch planning begins. Otherwise, the machine simply follows bad information.
Missing Underlay Causing Loose Stitches
Underlay gives the top stitches a base to sit on. It also helps manage fabric movement and provides structure beneath areas that need stronger coverage.
A basic conversion may create the visible stitches without building suitable underlay underneath them.
That can lead to:
- Loose-looking coverage
- Weak edges
- Poor registration
- Uneven fills
- Fabric showing through in areas that should look solid
This is one reason a file can have the right colors and general shape but still look unfinished.
Why Free Converters Can't Read Your Design Correctly

The main issue is not simply that a tool is free. The problem is that automatic conversion cannot make every design decision that a trained digitizer makes.
No Manual Stitch Path Control
Stitch direction has a direct effect on how an embroidered shape looks.
Consider a leaf. A person digitizing it can decide how the stitches should follow the shape of the leaf and where the direction should change. An automatic converter may divide the same shape according to simple visual rules.
That difference becomes more noticeable when a design contains:
- Curved lettering
- Narrow columns
- Small shapes
- Overlapping elements
- Irregular outlines
- Fine details
Manual control also helps reduce unnecessary needle movement and keeps related sections connected in a sensible order.
Wrong Stitch Type for the Design Elements
Not every part of a design should use the same stitch structure.
A small border may work better with a running stitch. A narrow letter may need a satin stitch. A broad background area usually needs a fill approach.
When the wrong stitch type covers an element, the result can look flat, heavy, rough, or distorted.
Fill Stitches Used Where Satin Stitches Are Needed
Satin stitches create a smooth, raised appearance across narrow areas such as lettering and borders.
A fill stitch works differently. It covers larger areas through repeated rows of stitches.
If a narrow shape gets treated as a fill area, the edges can become less defined and the design may gain unnecessary density. On the other hand, trying to use satin stitches across a very wide area can create its own problems.
The stitch choice should match the size and shape of the artwork.
No Push and Pull Compensation
Fabric moves during embroidery. A design does not always keep the exact dimensions it had on screen.
Pull compensation helps account for areas that may draw inward as stitches build up. Push can affect shapes in another direction, particularly in larger filled sections.
This is why a perfectly measured circle in artwork may not remain a perfectly measured circle after stitching.
Good digitizing anticipates that movement instead of reacting to it afterward.
How Fabric Type Affects a Poorly Digitized File

The same PES file can behave differently on two fabrics. That surprises people until they see how much fabric structure changes the result.
Stretch Fabrics Need Extra Stabilization
Jersey, performance knits, and other stretchy materials move more easily under the needle.
If a design contains heavy coverage without enough support, the fabric can shift around the stitches. Letters may lose their shape, and curves can become uneven.
For these fabrics, the digitizing plan may need:Stronger or more suitable underlay
- Controlled density
- Appropriate stitch direction
- Stabilization suited to the material
- Compensation for fabric movement
A file that looks fine on a firm woven fabric can expose its weaknesses quickly on a stretchy shirt.
Dense Designs on Delicate Fabric
Delicate fabric presents the opposite kind of challenge. Too many stitches can leave the material stiff, puckered, or visibly marked.
I have found that people sometimes judge embroidery quality by coverage alone. More stitches do not automatically mean better coverage. In many cases, the cleaner result comes from using fewer but better planned stitches.
The goal is to place enough stitches for the intended appearance without filling every available space.
Signs Your PES File Was Never Properly Digitized
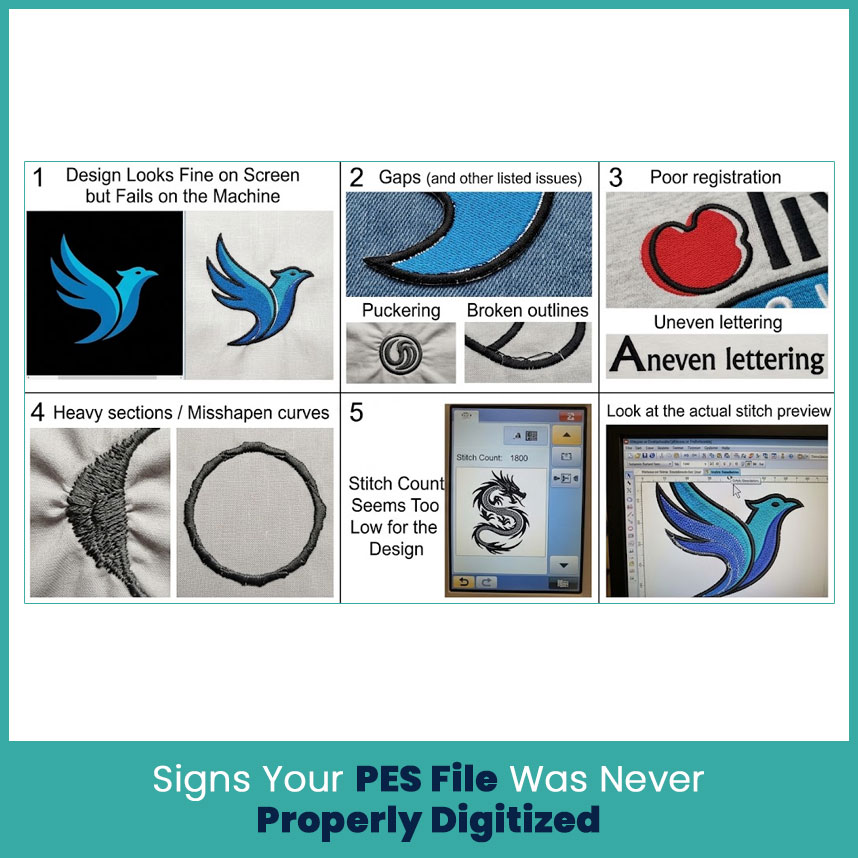
You can usually find clues before stitching the entire design.
Design Looks Fine on Screen but Fails on the Machine
This is one of the clearest signs.
If the artwork looks right but the fabric shows:
- Gaps
- Puckering
- Poor registration
- Broken outlines
- Uneven lettering
- Heavy sections
- Misshapen curves
then the problem may sit inside the stitch structure rather than the original artwork.
A machine does not stitch the picture you see. It follows the instructions stored in the embroidery file.
Stitch Count Seems Too Low for the Design
A very detailed design with an unusually low stitch count deserves a closer look.
A low count does not automatically mean the file is bad. Simple artwork can use surprisingly few stitches. The concern comes when the stitch count does not match the amount of coverage and detail the design needs.
For example, a detailed logo with several solid areas, lettering, and outlines cannot always reproduce those elements accurately with an extremely small amount of stitch information.
Look at the actual stitch preview, not just the number.
What Professional Digitizing Adds That Free Tools Miss
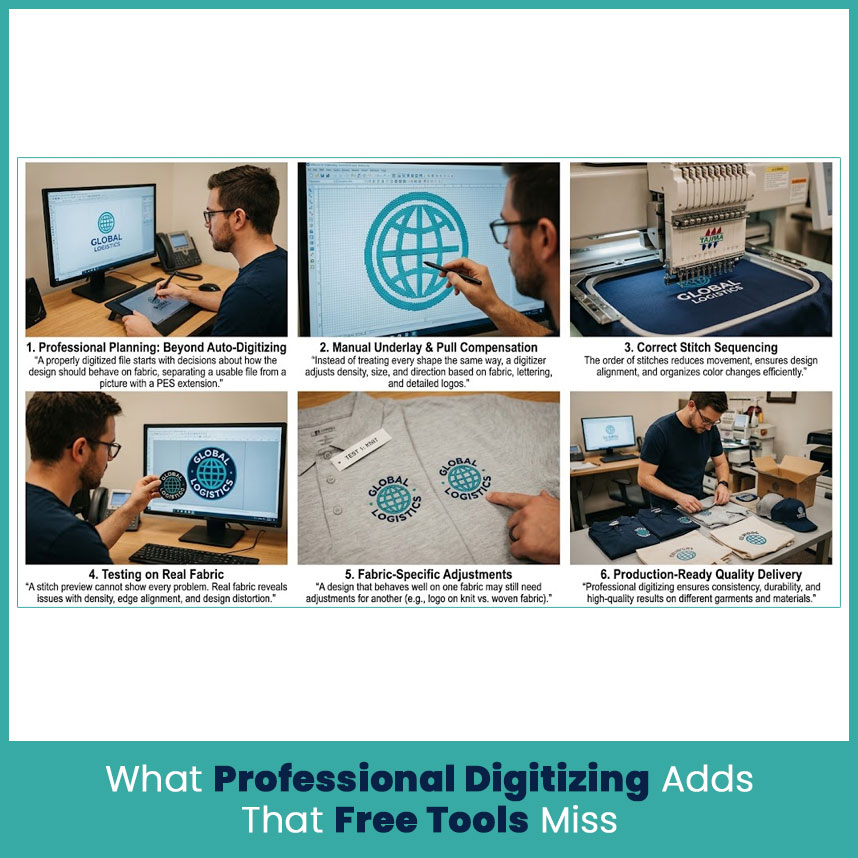
A properly digitized file starts with decisions about how the design should behave on fabric. That planning separates a usable embroidery file from a picture that simply has a PES extension.
Manual Underlay and Pull Compensation
A digitizer can decide where underlay belongs and how it should support the top layer.
The same applies to compensation. Instead of treating every shape the same way, the digitizer can adjust areas based on their size, direction, fabric, and surrounding elements.
That small amount of planning can make a noticeable difference in lettering and detailed logos.
Correct Stitch Sequencing
The order of the stitches matters.
A sensible sequence can reduce unnecessary movement and help different parts of the design meet cleanly. It can also reduce the chance of one section disturbing another section that was already stitched.
Color order matters too. A good sequence keeps the design organized instead of jumping randomly from one area to another.
Testing on Real Fabric Before Delivery
A stitch preview cannot show every problem.
Real fabric tells you much more. It shows whether the lettering stays open, whether the edges line up, whether the density works, and whether the design keeps its intended shape.
That is why testing matters, especially for logos that will appear on different garments or materials. A design that behaves well on one fabric may still need adjustments for another.
Final Thoughts
A jpg to pes converter free tool may solve a file format problem, but embroidery needs more than a different extension. The important part is the stitch planning behind the file.
If the design contains simple shapes, you may get a usable starting point from automatic conversion. For a logo, detailed artwork, small lettering, or stretchy fabric, though, the stitch structure deserves much more attention.
Before blaming your machine, thread, needle, or fabric, take another look at the PES file itself. Sometimes the problem was already built into the design long before the first needle movement.
FAQs
Can a JPG file be directly stitched without digitizing?
No. A JPG contains image information, not stitch instructions. It needs to be converted into a properly structured embroidery file before a compatible machine can stitch the design correctly.
Why does my free converted PES file break threads so often?
The file may contain excessive density, short stitches, poor sequencing, or unnecessary overlaps. Check the stitch structure before assuming the thread or machine caused the problem.
Is a free JPG-to-PES converter ever good enough?
It can work for very simple artwork, but automatic conversion has limits. Basic shapes may convert reasonably well, while detailed logos, small lettering, and designs for stretch fabrics usually need more control.
How do I know if my PES file needs redoing?
Stitch the design on the actual fabric you plan to use. If you see repeated thread breaks, puckering, gaps, poor registration, distorted lettering, or heavy areas, the file likely needs technical correction rather than another format conversion.
Author Bio
Matthew Davis
Senior Embroidery Digitizer
I'm Matthew Davis, a skilled embroidery digitizer with more than 15 years of practical experience. I specialize in logo digitizing, 3D puff embroidery designs, applique digitizing, custom embroidery digitizing, and working with difficult fabrics.
Over the years, I have worked with different fashion brands and production teams worldwide. I always share simple tips and useful techniques to help both beginners and businesses improve their embroidery work.
Post a reply